


This article will guide you through the process of building an AR-15 lower receiver. Assembly is actually pretty simple especially when you follow the steps outlined below.
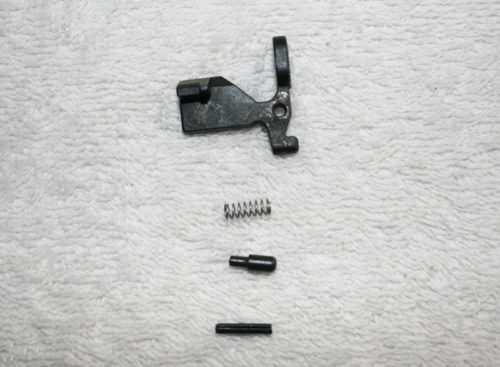
From top to bottom: Bolt Catch, Bolt Catch Spring, Bolt Catch Plunger and Bolt Catch Roll Pin
A) You will first want to start the installation of the roll pin into your lower receiver as shown below. Apply masking tape to the nearby areas to keep from scratching the surfaces. Make sure the pin is not protruding into the gap, otherwise the bolt catch will not fit.
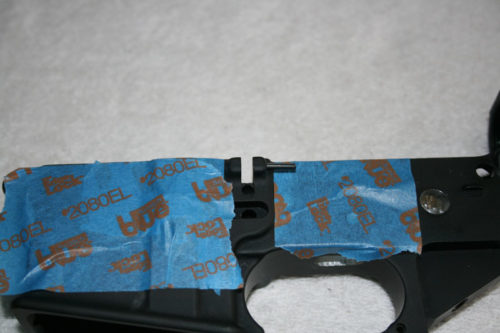
B) Next you will connect the bolt catch plunger and spring, then insert into the hole in your lower receiver as shown.
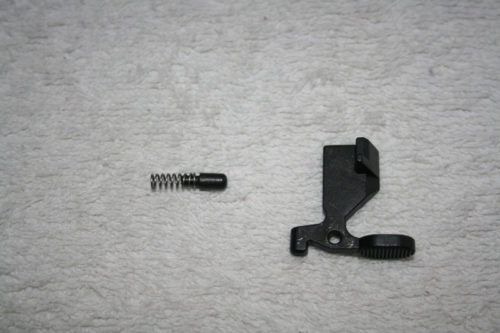

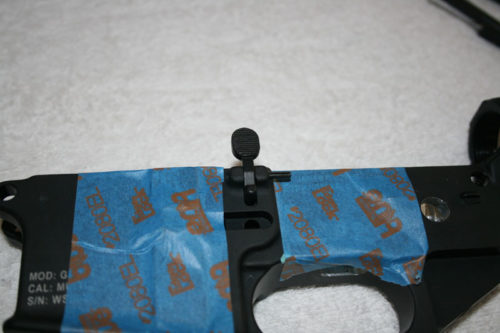
C) For the last part of the bolt catch assembly you will hold the bolt catch in place while hammering the pin through with a soft faced hammer. A set of roll punches is also helpful to push the roll pint through
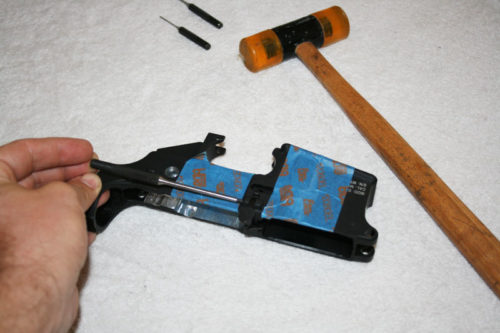
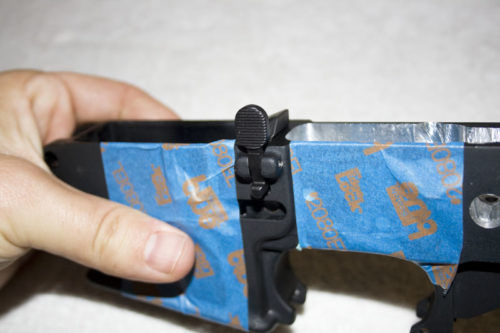
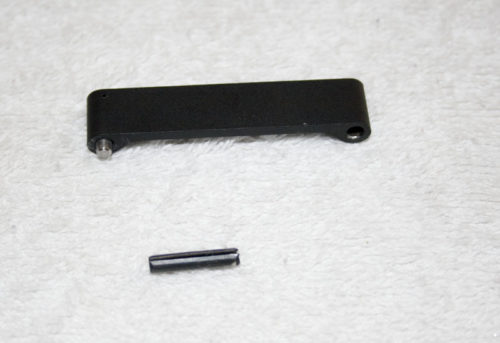
Trigger Guard and Trigger Guard Roll Pin shown above.
A) You will notice the trigger guard already has a spring loaded pin on one end. This end will be inserted on the side closest to the magazine well.
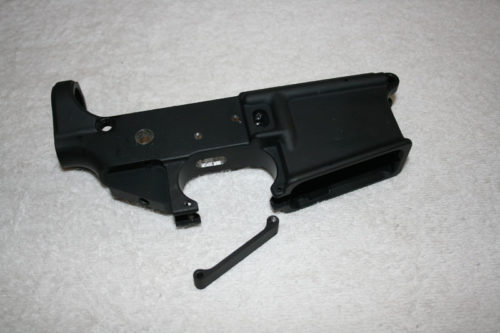
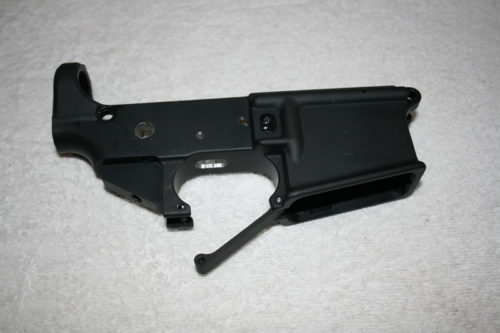
B) Next you will want to install the roll pin on the other side through the trigger guard. This can be done a few ways, my preferred approach is to use a vice to squeeze the pins through. Using masking tape on the opposite side of the receiver to protect it from scratching, tighten the vice to push the poll pin in place.
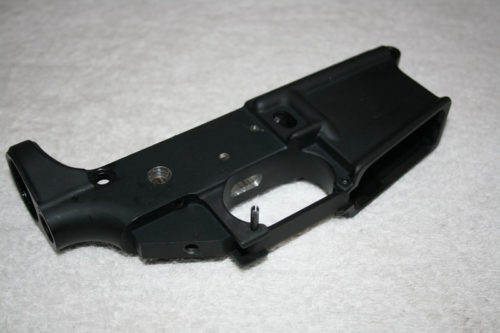
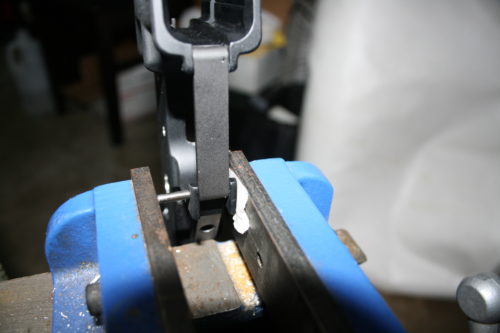
Alternatively, you can use a soft face hammer while supporting the underside of the receiver with a wood block.
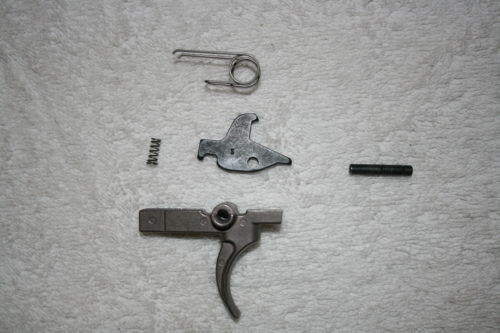
Trigger, Trigger Spring, Disconnector, Disconnector Spring, Trigger Pin (same as hammer pin)
A) The first step for trigger assembly is to properly install the trigger spring on to the trigger as shown below. The trigger and hammer spring look similar however the hammer spring is a bit thicker and stronger.
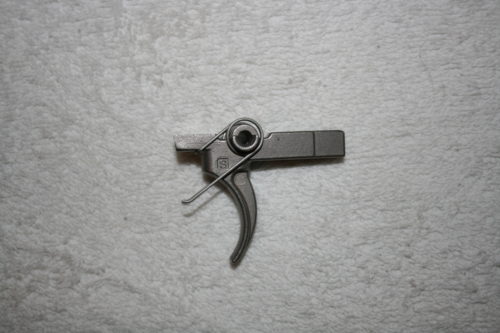
B) Next you will insert the disconnector spring into the trigger. Note that the spring is flared or tapered, one end is larger than the other side. The larger end is pressed into the trigger as shown below, once installed it should stay firmly in place.
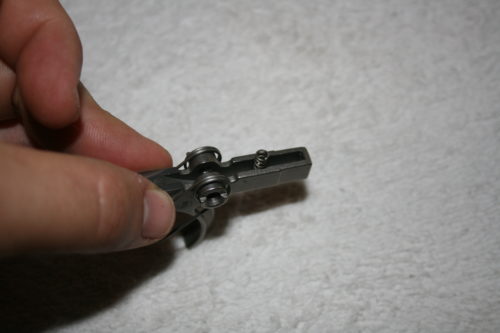
C) Insert the disconnector on top of the trigger like shown below, then drop the trigger assembly into your lower and start the installation of the pin on either side of your receiver. The ends of the trigger spring should be facing toward the magazine well on the bottom of the trigger pocket.
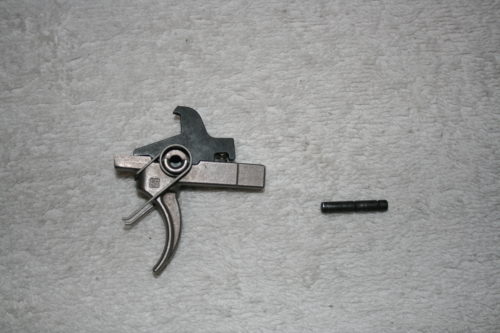
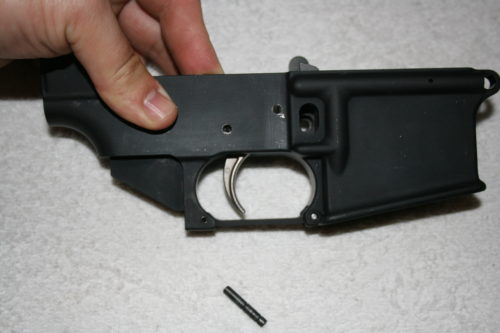
D) Align the holes of the trigger and disconnector through your receiver so that you can push the trigger pin through. This can be a tricky step since the spring is applying tension to the trigger making if difficult to align with the disconnector and receiver. You will have to wiggle the trigger and disconnector to have the holes line up so that the pin can go all the way through.
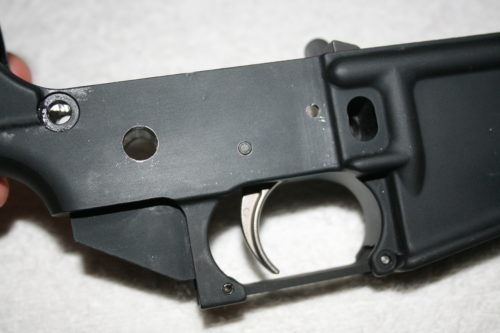
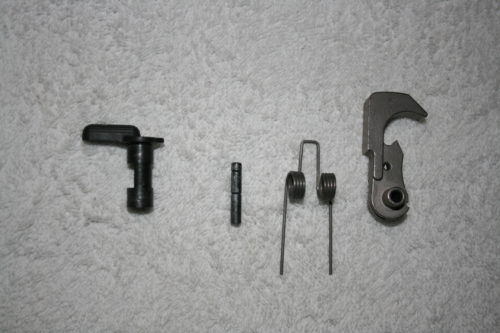
From left to right: Safety Selector, Hammer Pin, Hammer Spring and Hammer
A) Insert the safety selector into your receiver, for now this is all you need to do with it but it must be installed at this point. The detent for the safety will be installed on step 7.
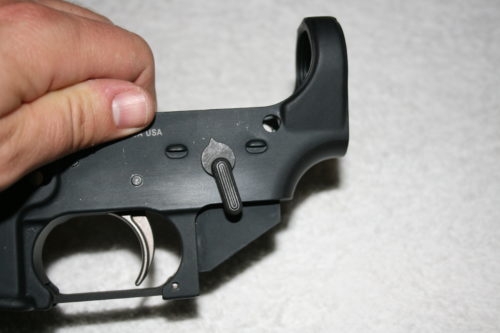
B) Next you need to install the hammer spring on the hammer like shown below.
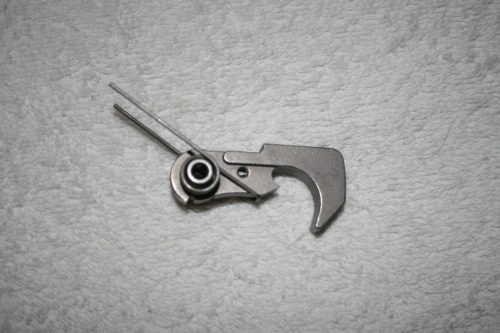
C) This is another tricky step. Lower the hammer into your receiver with the two ends of the hammer spring resting behind the trigger pin. Then push the hammer further down until the holes of the hammer and lower receiver line up. Finish the hammer install by inserting your hammer pin. You made need to wiggle things around again and use a soft faced hammer to punch it in.
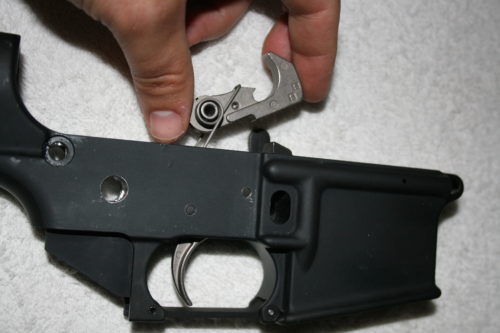
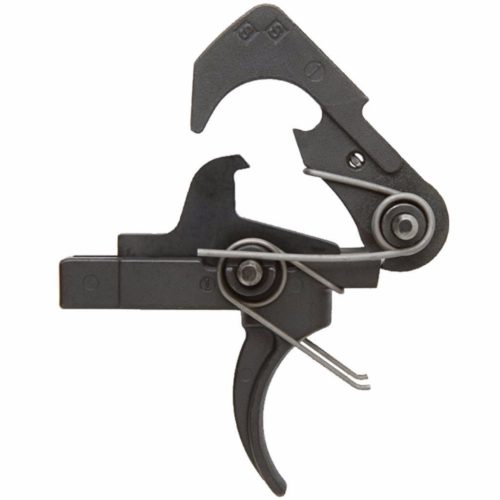
This is what the trigger and hammer assembly should look like inside your receiver, note the position of the hammer spring resting on the trigger pin.
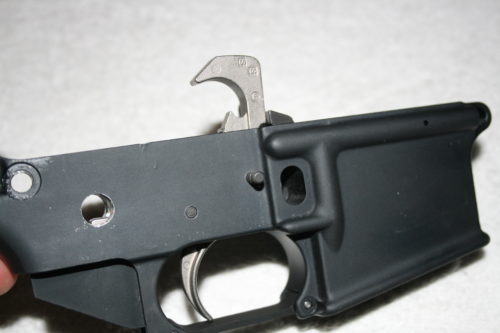
Lastly finish pushing the hammer pin through the lower with a soft face hammer.
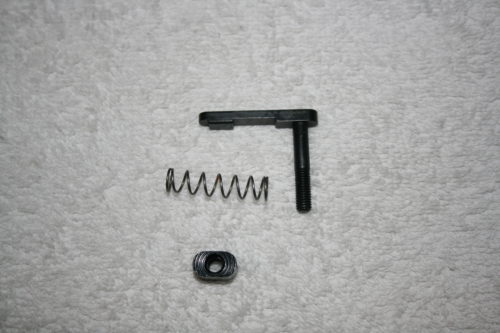
From top to bottom: Magazine Catch, Magazine Catch Spring and Magazine Catch Button.
A) Insert the magazine catch into the receiver like shown below:
B) Insert the magazine catch spring from the other side of the receiver so that it slips over the threads of the magazine catch.
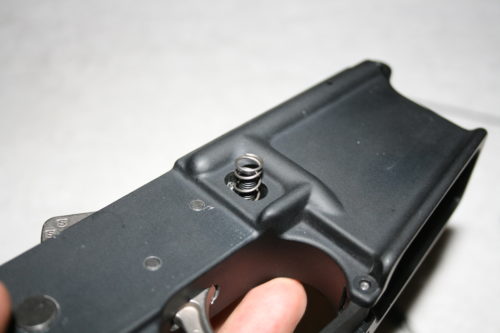
C) Insert the magazine release button into the receiver and press inward as far as possible while threading the magazine catch. It is helpful to use a roll punch or pen resting against your work surface to press the magazine button while threading.
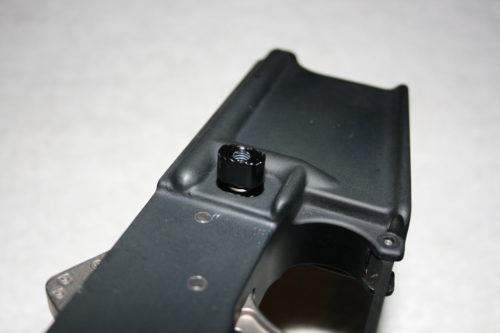
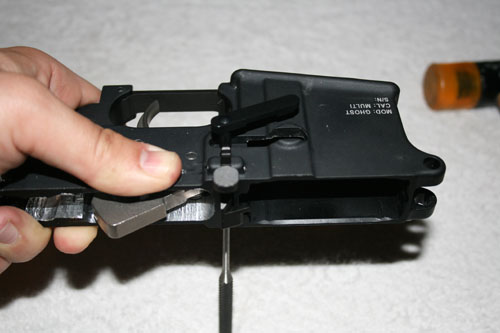
Use a roll punch to press against the magazine catch button while threading magazine catch on the other side. Once your magazine catch barely passes over your receiver let it retract back into your receiver. Done!
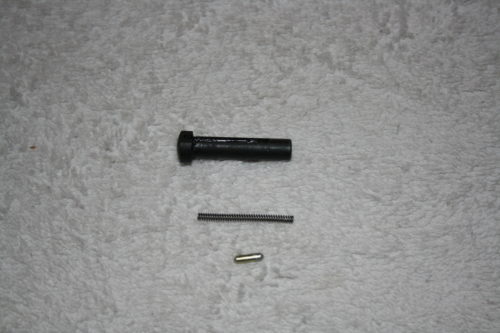
NOTE: There is a good chance at some point during this step that you will shoot the detent out of your receiver on accident, so it is good practice to “aim” the detent into a towel or direction while installation that will be easy to find a shot out part as tiny as the detent! Trust me on this one.
A) Insert detent spring and detent into your receiver.
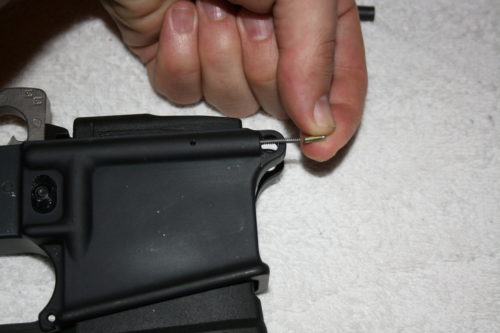
B) This can also be a tricky step and it helps greatly to have a XX roll punch to slide through your receiver to hold things in place during installation. Carefully push the roll punch through your receiver while pressing the detent into the detent hole. It should look like the following:
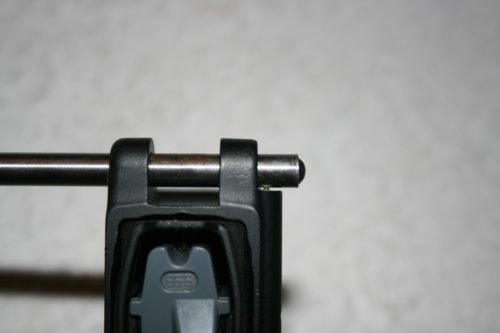
C) Next take the pivot pin (longer than the rear takedown pin) and with the receiver “aiming” into a rag, carefully push the pivot pin against the roll punch until you have swapped the locations and the detent is now in contact with the pivot pin.
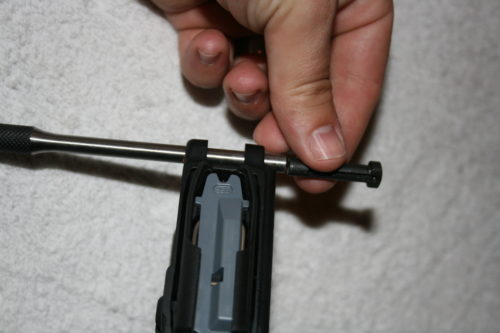
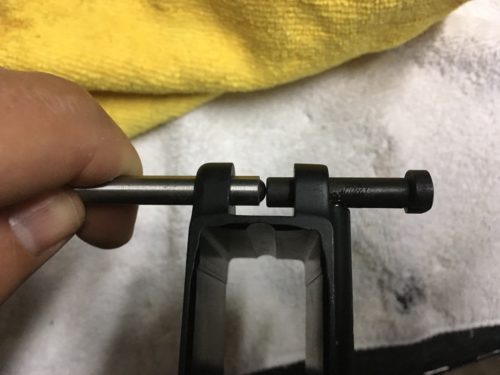
This step can be done without a roll punch however it is a little more difficult and it will probably take a few tries. Just keep aiming the detent into a towel.
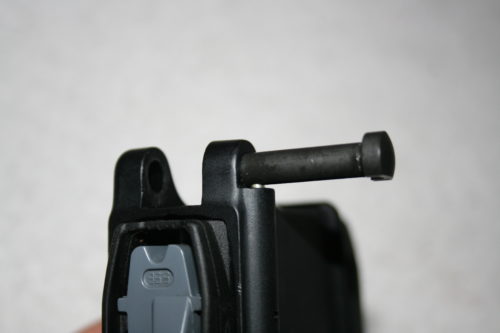
A) Insert the safety detent into your receiver with the pointy end facing the safety selector you installed on step 4.
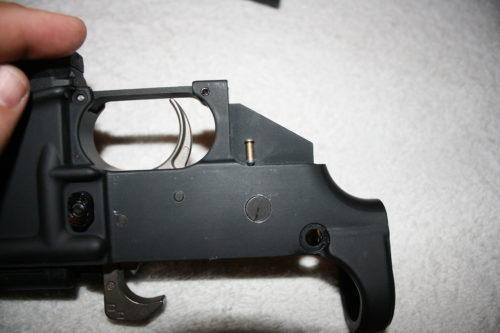
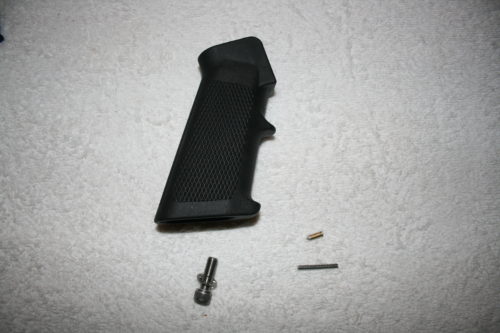
B) Insert the safety detent spring into the handle like shown below, then install the handle with the spring inside the safety detent hole. Make sure you do not bind the spring at this point.
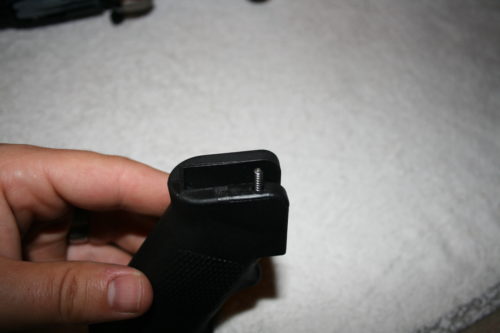
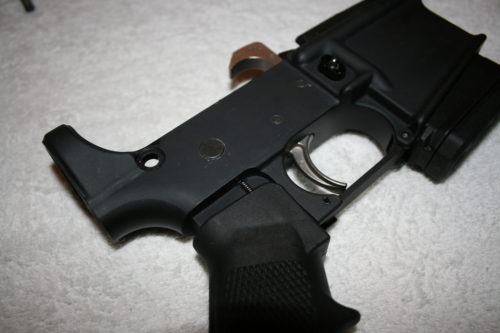
C) With the handle and spring in position, secure the handle to the receiver with the bolt and locking washer.
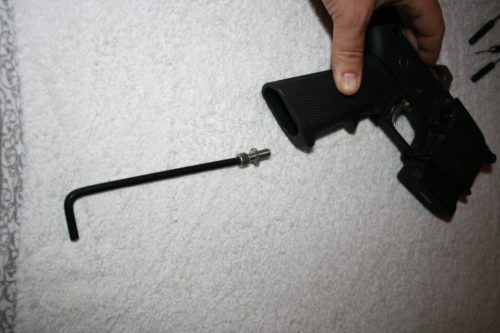
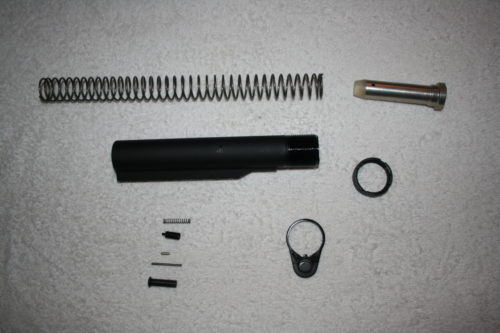
Top to bottom: Buffer Spring, Buffer, Buffer Tube, Castle Nut, Buffer Retainer Spring, Buffer Retainer, Takedown Detent, Takedown Detent Spring, Takedown Pin and bottom right is Receiver End Plate.
This step groups several procedures together since they rely on each other to capture and retain parts. You will see why as you go, it’s just the nature of the AR design.
A) Thread the castle nut all the way onto your buffer tube making sure the larger cutouts in the castle nut face away from the threads on the buffer tube like shown below.
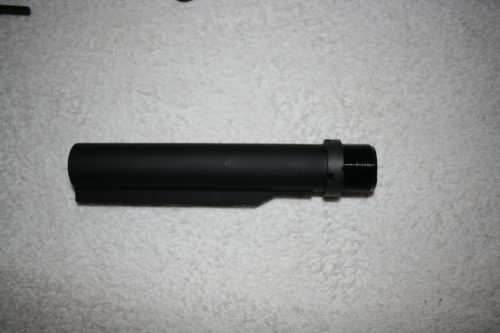
B) Insert the receiver end plate over the threads of the buffer tube. Note that there is a groove on the tube to align the position of the receiver end plate, it should look like the following:
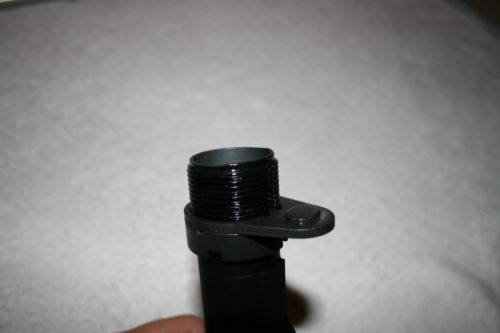
C) With the receiver end plate on the buffer tube, thread the buffer tube into the lower receiver until it just begins to approach the buffer retainer hole, leaving room to install the buffer retainer.
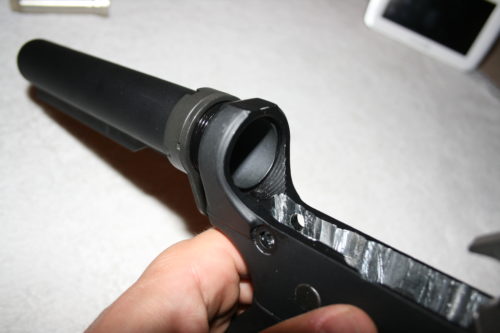
D) Next install the takedown pin into your receiver.
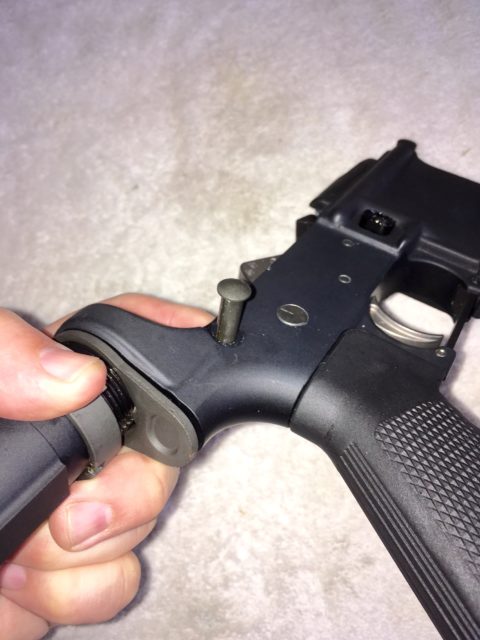
E) Insert the buffer retainer spring and buffer retainer into your receiver. While pressing the buffer retainer into your receiver thread the buffer tube until it just threads over the top of the retainer.
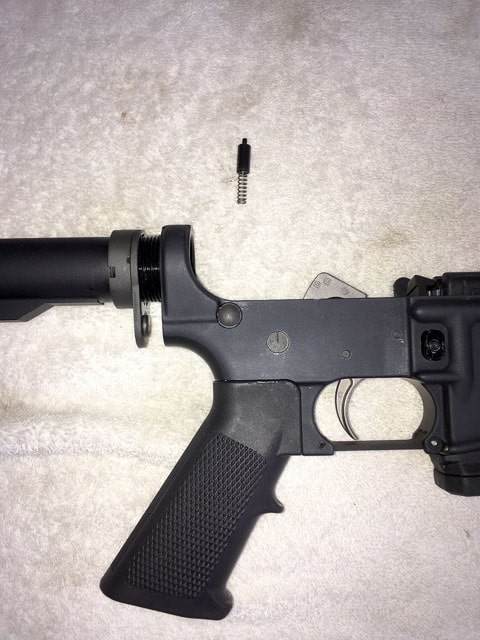
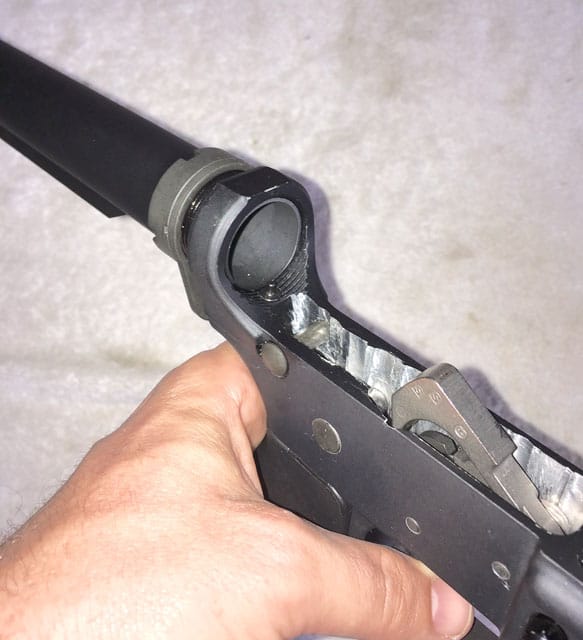
F) Insert the takedown detent followed by detent spring. You may need to rotate the buffer tube and receiver end plate in order to gain access to the takedown detent hole in the receiver.
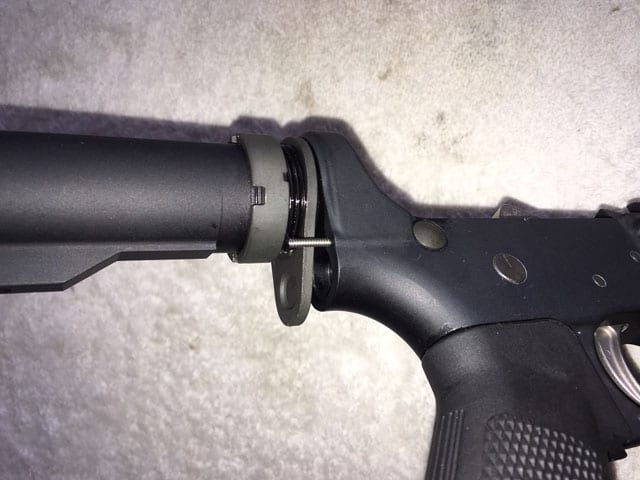
G) Press the takedown detent spring against the receiver and rotate the buffer tube in place. Slide the receiver end plate against the spring keeping pressure against the end plate while threading in your castle nut all the way in.
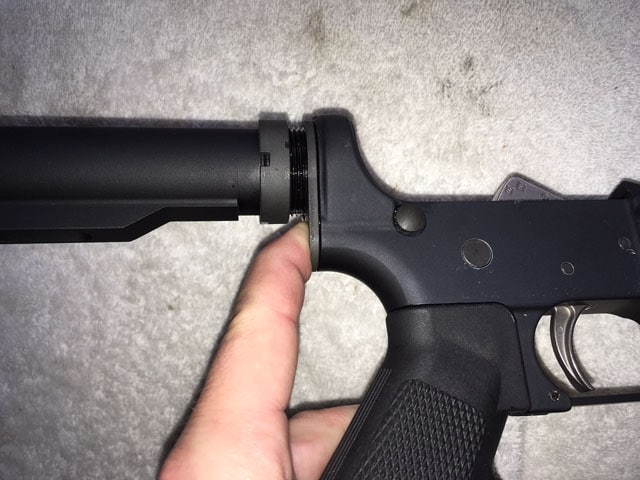
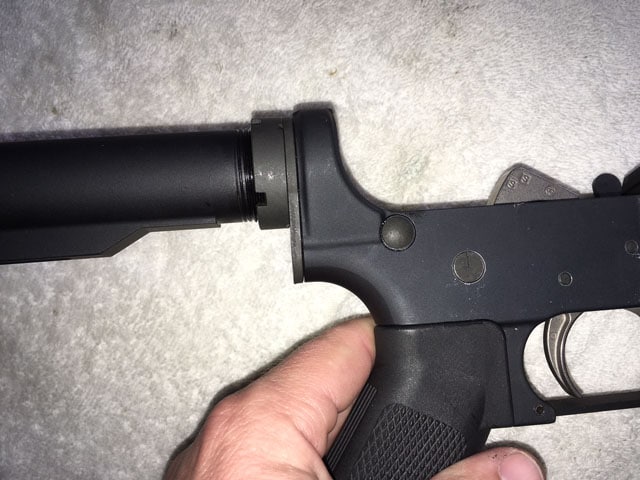
H) Using an armorers wrench and torque wrench, tighten the castle nut to 40 ft/lbs.
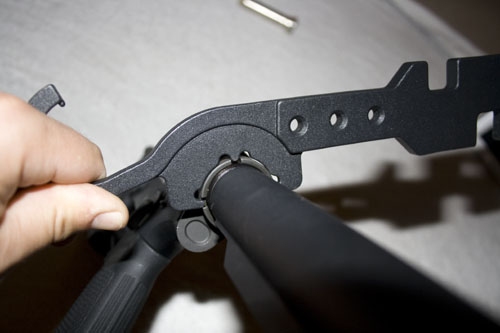
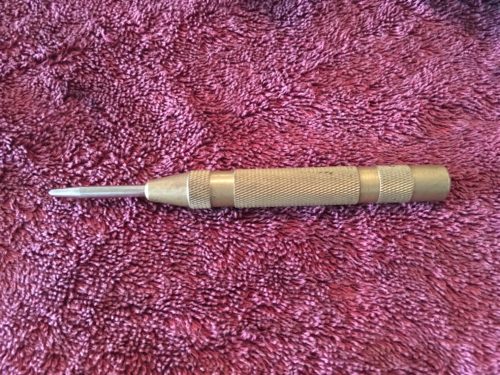
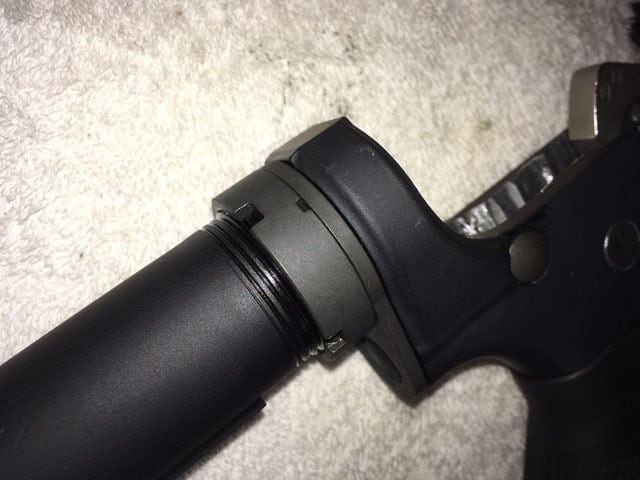
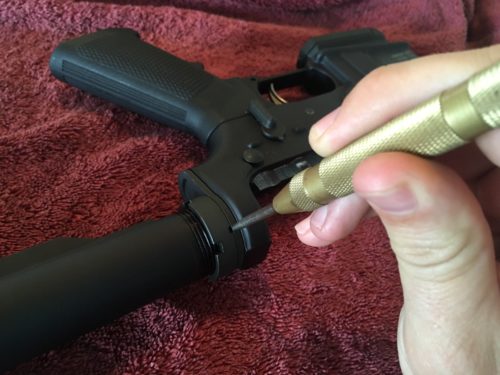
I) Using a center punch, dimple the receiver end plate into the castle nut groove to prevent the castle nut from rotating loose. No need to overdo the dimple, all you need is some material from the end plate to extend into the castle nut groove.
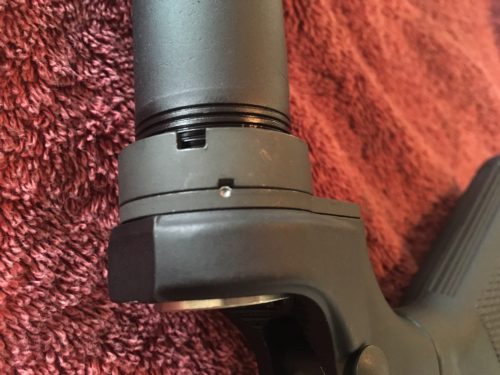
J) Next you will want to insert your buffer spring and buffer into the buffer tube until it snaps into position.
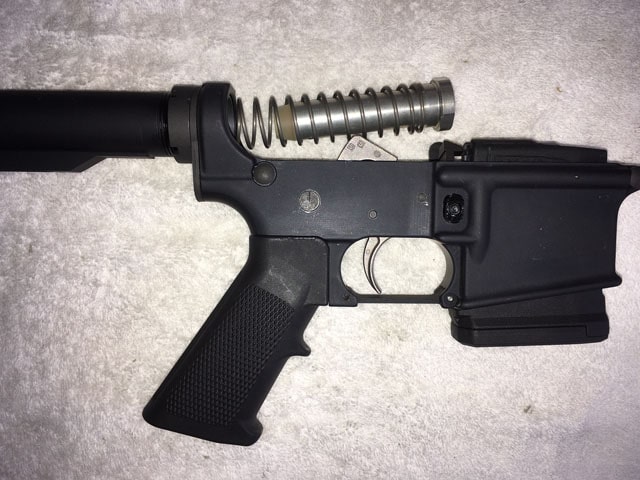
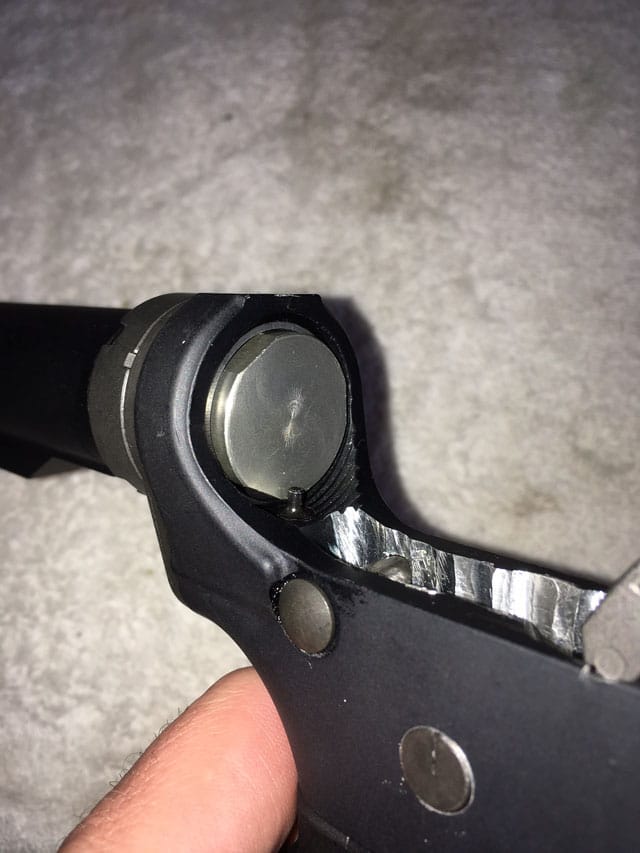
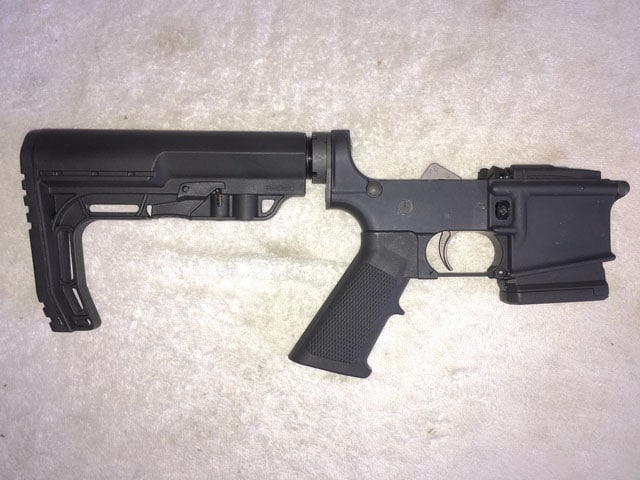
K) Lastly, you can now install your stock over the buffer tube.
Here is a short supplemental video to assists all the steps written in detail:
You have just completed your lower receiver installation, I suggest you lubricate your lower receiver prior to firing. See the guide to cleaning and lubricating your AR-15 here.
See also helpful gunsmithing tools to make installation easier.
Caligunner Copyright © 2018.
All Rights Reserved. Caligunner.com is a participant in the Amazon Services LLC Associates Program, an affiliate advertising program designed to provide a means for sites to earn advertising fees by advertising and linking to amazon.com.